Monday, April 2, 2018

Jello cake

Easy Strawberry Jello Cake

This Strawberry Jello Cake has to be one of our all-time favorite desserts made with yellow cake, strawberry mousse and a beautiful mirror glaze. It’s perfect for holidays like Mother’s Day, Valentine’s Day, birthdays or a party!
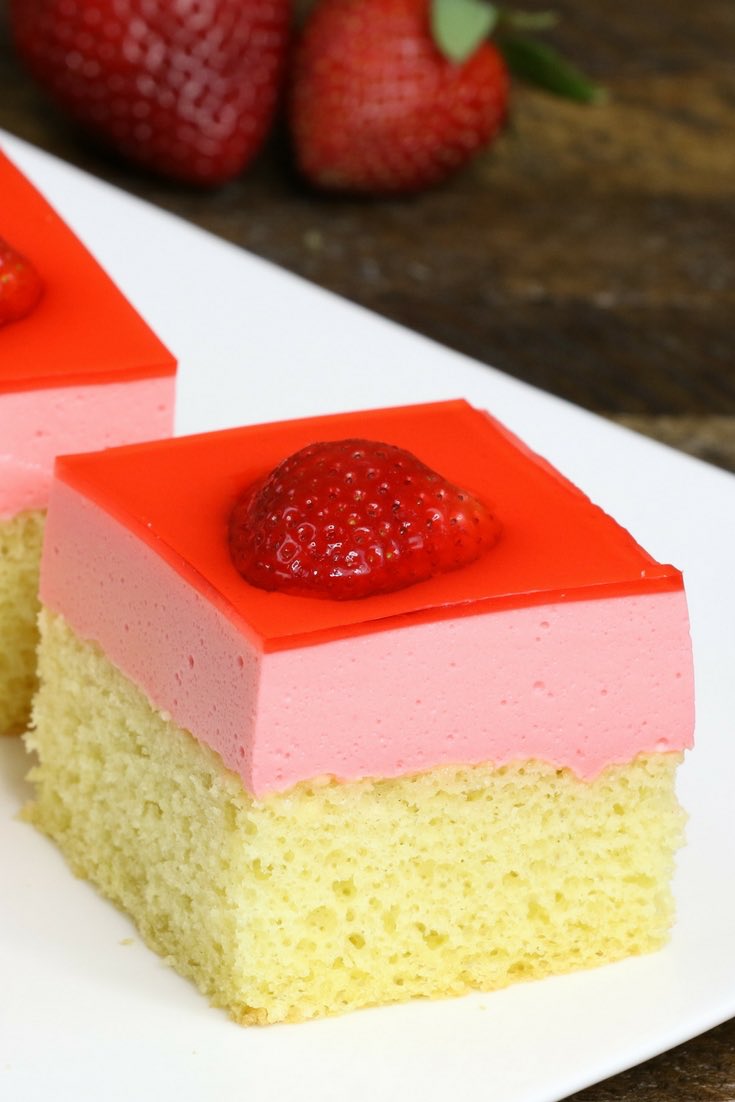
This strawberry jello cake video was one of our biggest Facebook videos ever with more than 15 million views! It’s a showstopper that you can make up to a day ahead for a celebration.
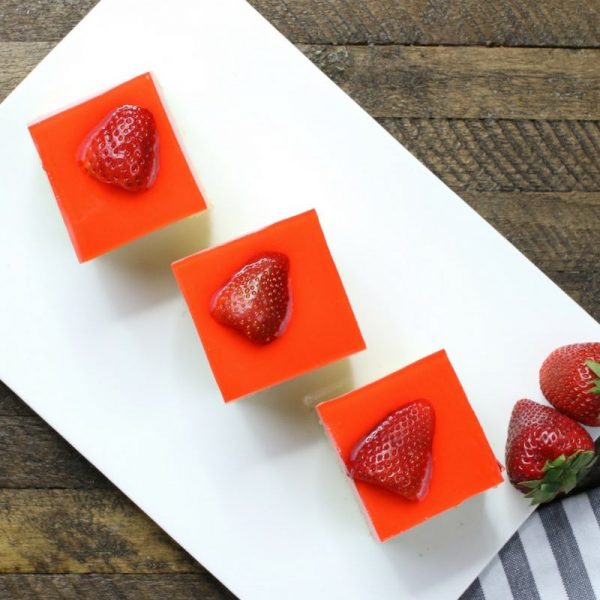
Serve it standalone or with fresh berries and whipped cream on the side. The jello makes it easy to serve, since the pieces can easily be lifted out of the pan with any rigid spatula.
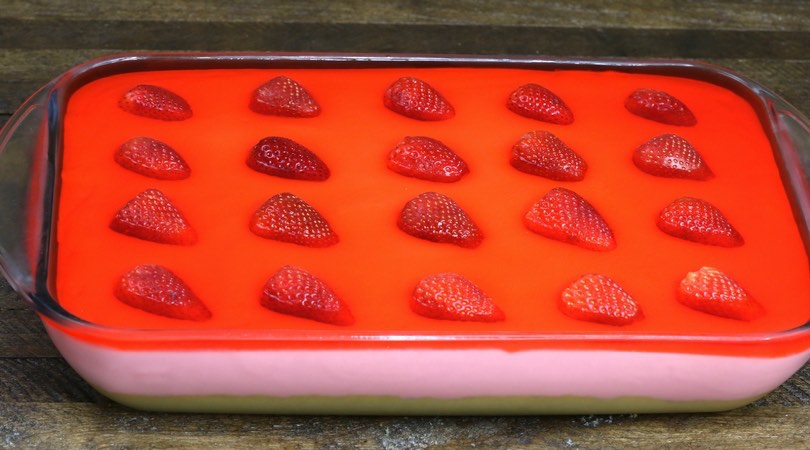
You make this cake with three layers inside a rectangular baking dish. The bottom layer is a simple fluffy sponge cake (you can use store bought cake mix or make your own).
The middle layer is an easy strawberry filling made with whipped cream and strawberry jello. Halved strawberries go on the top along with a strawberry jello glaze.
How to Make Strawberry Jello Cake

Start this recipe by making the bottom yellow cake layer. You can use a cake mix, although you’ll only need half of the box to get a one-inch layer.
If you prefer homemade, simply beat 4 eggs with a 1/2 cup of sugar for about 5 minutes to get it fluffy. Then fold in a 1/2 cup of flour until blended…
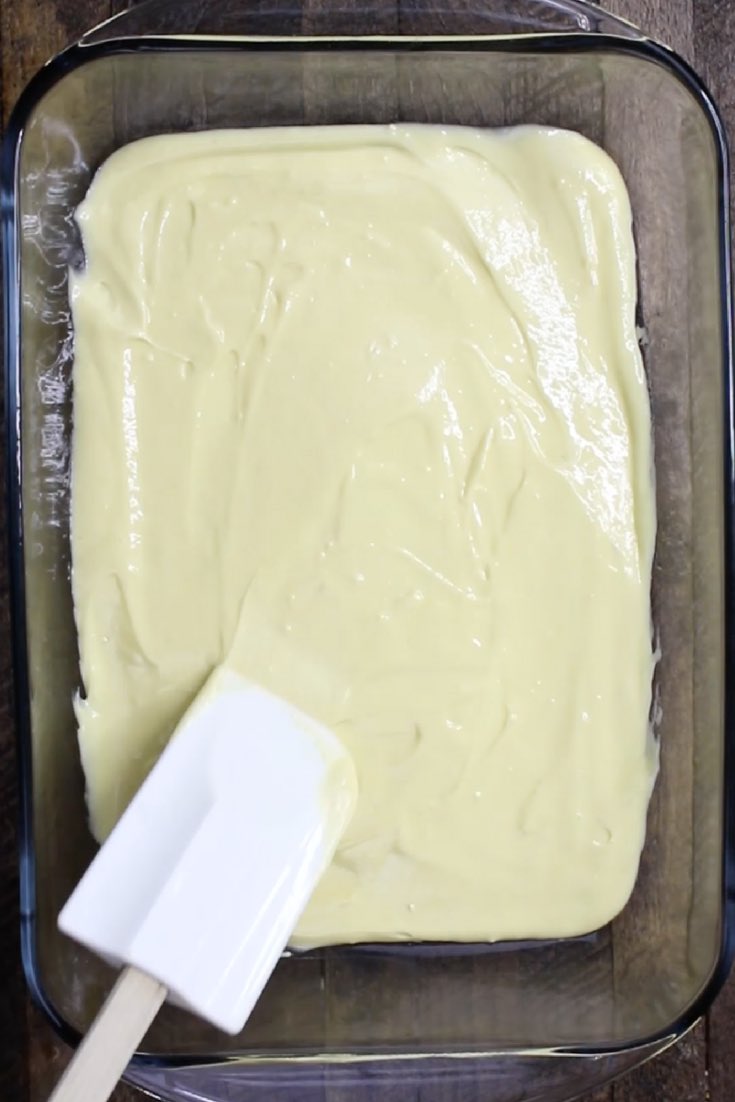
While the cake is baking, you can make the jello filling. If you want to use natural jello or agar agar, Simply Delish Strawberry Jel works well as a direct substitute for the jello powder. Just note the package sizes are different than jello, so get the same number of ounces.
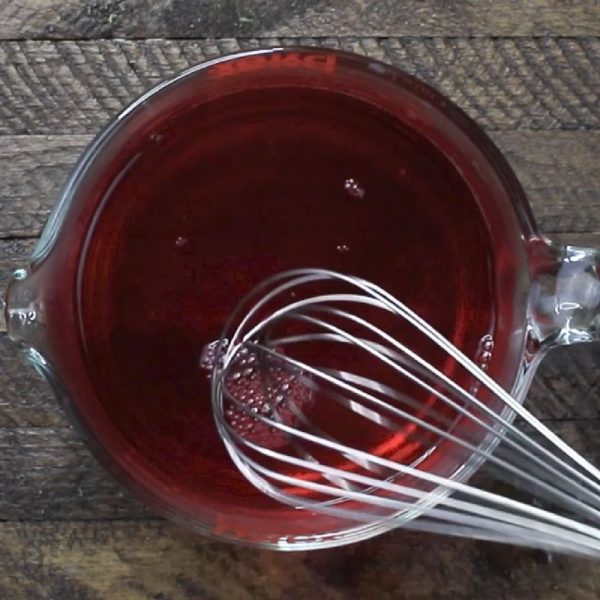
Let the jello set while the cake bakes and then cools. When you mix the jello with whipped cream, the jello can still be liquid or soft setting, meaning it has a slight jiggle and running a spoon creates streaks through it.
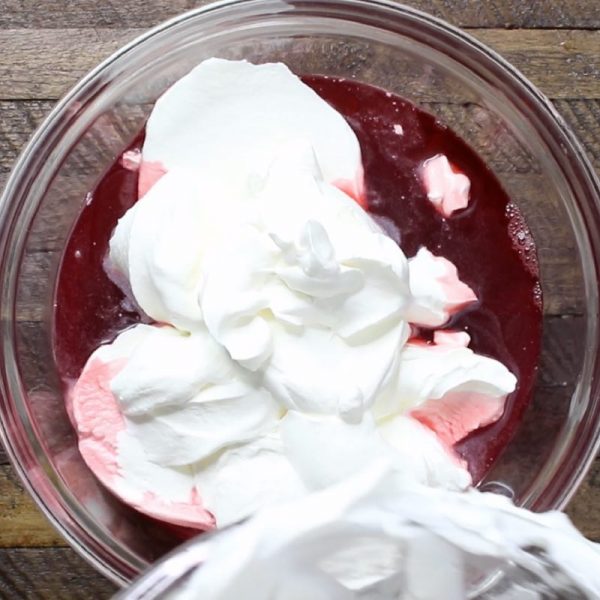
Whisk it together with whipped cream and you will get light-pink colored filling, then you’ll be ready to pour it on top of the cooled cake.
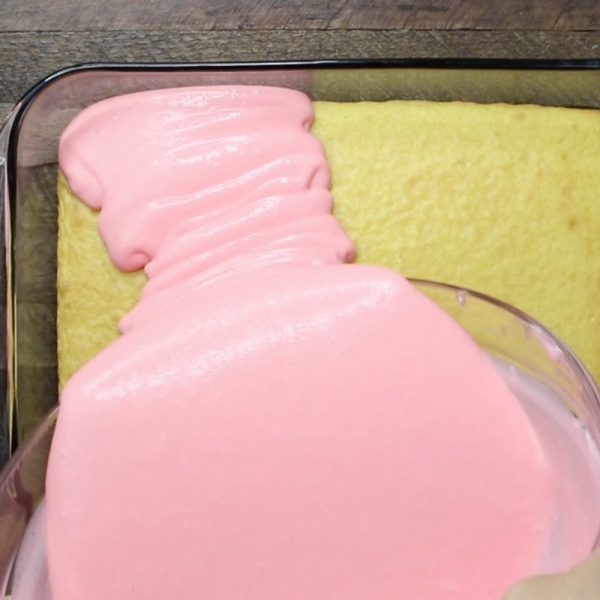
Depending on how big they are, you can fit about 20 berries in about a 4×5 pattern across the top. Then chill for an hour or more for the filling to set.
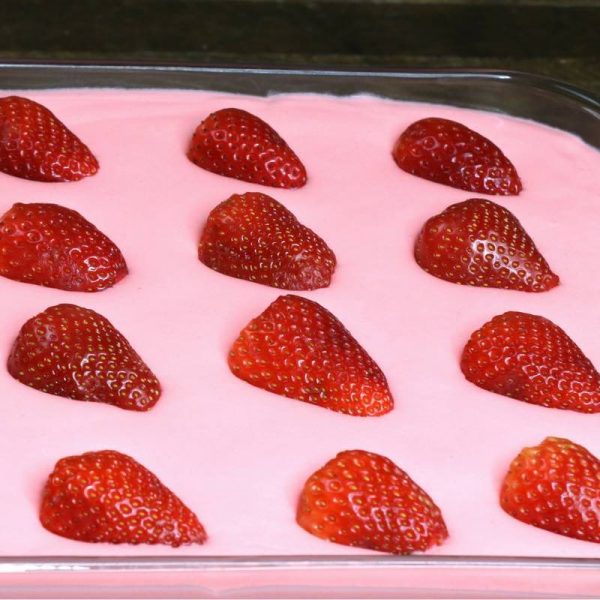
After the filling has set, you’re ready to add the mirror glaze. Make more strawberry jello the same way as for the filling, and let it cool to room temperature.
If you’re in a hurry, put your bowl of jello in an ice water bath for 5-10 minutes and stir a few times and it’ll be ready.
It’s best to pour the jello glaze over the back of a spoon, which helps it to dribble and avoid penetrating your filling. It’s fine to dribble onto the strawberries as well as the filling…
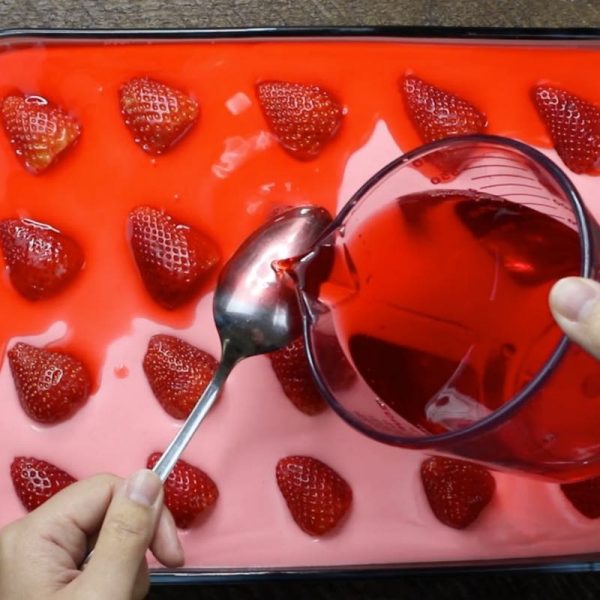
Once the mirror glaze is on, carefully place the entire dish into the fridge to chill for one more hour. Then you’re ready to serve!
You can make this cake up to two days in advance, as it keeps nicely in the fridge covered in plastic wrap.

Watch How to Make Strawberry Jello Cake:

3.73 from 158 votes
 Print

Strawberry Jello Cake

This Strawberry Jello Cake has to be one of our all-time favorite desserts... made with yellow cake, strawberry mousse and a beautiful mirror glaze. It's perfect for holidays like Mother's Day, Valentine's Day, birthdays or a party!
 Course Dessert
 Prep Time 40 minutes
 Cook Time 20 minutes
 Total Time 3 hours
 Servings 12 servings
 Calories 241 kcal
 Author TipBuzz
Report this ad

Ingredients

Cake

  • 1/2 15-oz box yellow cake mix or white cake mix, see note
  • half of ingredients on cake mix box eggs, oil, water etc

Strawberry Mousse

  • 6 oz strawberry jello powder two small boxes
  • 2 cups boiling water
  • 1 cup cold water
  • 3 cups whipped cream or cool whip, see note

Mirror Glaze

Instructions

Cake

  1. Preheat oven to 350°F. Grease the bottom of a 13x9 inch glass baking dish and set aside.
  2. In a medium bowl, prepare the cake batter according to the instructions on the box. [If you prefer a homemade version, see note below]
  3. Pour cake batter evenly into the prepared pan. Bake for 15-20 minutes until golden and puffy.
  4. Remove from the oven and cool in the pan at least 30 minutes. Meanwhile, make the strawberry mousse.

Strawberry Mousse

  1. In a medium bowl, add 6 oz strawberry jello and 2 cups of boiling water. Stir slowly for one minute to dissolve.
  2. Stir in 1 cup of cold water and set aside to cool for about 30 minutes, or until it can coat a spoon.
  3. Add the whipped cream/topping to the jello and mix until smooth. Don't worry if the texture is runny, as it will firm up while setting.
  4. Once the cake is cool, spread the filling evenly across the cake using a spatula. Rap the pan on the counter a few times to level the filling and remove any trapped air.
  5. Chill for at least 1 hour on a level surface in your fridge. Meanwhile, make the mirror glaze.

Mirror Glaze

  1. In a medium bowl, combine 3 oz jello powder with 1 cup boiling water and stir slowly for one minute until dissolved. Stir in ½ cup cold water and set aside to cool.
  2. Remove the cake from the fridge. Arrange strawberry halves on top of the filling, approx. 4 widthwise by 5 lengthwise.
  3. Once the jello is lukewarm, carefully pour it over the back of a spoon, dribbling across the top of the filling surface and over the strawberries.
  4. Chill one more hour to allow the glaze to set. Congratulations, you're done - enjoy!

Recipe Tips

-To make a yellow cake from scratch: In a medium bowl, beat 4 eggs and 1/2 cup white sugar for 5 minutes until fluffy; then fold in 1/2 cup all purpose flour until blended. -If you are planning to whip your own cream, it takes 1 1/2 cups of liquid whipping cream to make 3 cups whipped cream.
Nutrition Facts
Strawberry Jello Cake
Amount Per Serving
Calories 241Calories from Fat 81
% Daily Value*
Total Fat 9g14%
Saturated Fat 5g25%
Polyunsaturated Fat 1g
Monounsaturated Fat 1g
Cholesterol 34mg11%
Sodium 112mg5%
Potassium 47mg1%
Total Carbohydrates 37g12%
Dietary Fiber 1g4%
Sugars 31g
Protein 3g6%
Vitamin A6%
Vitamin C12%
Calcium4%
Iron2%
* Percent Daily Values are based on a 2000 calorie diet.


Tuesday, September 20, 2016

Miniature Chocolate Eclairs


Miniature Chocolate Eclairs Recipe - Eclairs filled with chocolate pudding and frosted with a semisweet chocolate glaze.
Recipe By:BIDDYBUG
"Eclairs filled with chocolate pudding and frosted with a semisweet chocolate glaze."

Ingredients

  • 1 (3.5 ounce) package non-instant chocolate pudding mix
  • 2 cups milk
  • 1/2 cup butter
  • 1 cup water
  • 1/8 teaspoon salt
  • 1 cup all-purpose flour

  • 4 eggs
  • 2 tablespoons butter
  • 2 ounces semisweet chocolate, chopped
  • 1 cup confectioners' sugar
  • 2 tablespoons milk
  • 1 teaspoon vanilla extract

Directions


  1. Prepare pudding with milk according to package directions. Chill 1 hour in refrigerator.
  2. Preheat oven to 400 degrees F (200 degrees C). Grease baking sheets.
  3. In a heavy saucepan, combine 1/2 cup butter, water and salt over medium-high heat. Bring to a boil, then reduce heat to low. Pour in flour all at once and stir vigorously until fully incorporated and mixture forms a ball. Remove from heat, let rest 5 minutes. Then beat in eggs, one at a time, until well combined.
  4. Drop dough into twelve equal mounds on baking sheets. Spread each mound into a 4x1/2 inch rectangle.
  5. Bake in preheated oven 35 minutes, until golden. Remove from oven and make a one-inch slit in the side of each eclair. Reduce heat to 375 degrees F (190 degrees C). Return eclairs to oven for 10 minutes. Transfer to a wire rack to cool completely.
  6. Prepare icing while eclairs are cooling. Heat 2 tablespoons butter with chocolate in a small saucepan over medium heat, stirring until melted. Remove from heat and stir in confectioners' sugar, 2 tablespoons milk and vanilla. Set aside.
  7. To assemble: Slice each eclair in half lengthwise. Spoon about 1 tablespoon chocolate pudding into the bottom half of each eclair. Replace tops and frost with chocolate icing. Chill until serving.

Phyllo Cups with Cappuccino Cream

Phyllo Cups with Cappuccino Cream


INGREDIENTS
·         3 sheets frozen phyllo dough, thawed
·         2 tablespoons unsalted butter, melted
·         2 tablespoons sugar
·         1 tablespoon instant espresso powder
·         1 cup cold heavy cream
·         2 tablespoons sweetened condensed milk
·         1/4 teaspoon ground cardamom or cinnamon
·         Coarse salt
·         1/2 teaspoon unsweetened cocoa powder
DIRECTIONS
1.       Preheat oven to 325 degrees. Lay 1 sheet phyllo on a work surface (cover remaining sheets with a lightly damp towel). Brush phyllo with one-third the butter and sprinkle with one-third the sugar. Repeat layering twice more with remaining phyllo, butter, and sugar. Cut stacked phyllo into 6 equal pieces and gently press each square into a cup of a standard muffin pan, crimping edges as needed so phyllo sits flat in bottom of cup.
2.      Bake until phyllo is golden brown, about 20 minutes, rotating pan halfway through. Let cool completely in pan on a wire rack.
3.      Meanwhile, in a medium bowl, combine espresso powder with a small amount cream and stir until powder dissolves. Stir in remaining cream, condensed milk, cardamom, and pinch of salt. Whisk until firm but not dry peaks form. Refrigerate until ready to serve (up to 2 days). Fill phyllo cups with cappuccino cream and sprinkle with cocoa powder. Serve immediately.

Friday, October 31, 2014

Spooky Cake Pop Witches

Halloween Dessert Recipe: Spooky Cake Pop Witches

Okay, we found the perfect Halloween treat that wonderfully encapsulates the holiday spirit—it’s a smidge labor-intensive, but so worth it when you see the adorable result and the joy on all the kids’ faces! (We’re assuming children will be eating them, but fact is everyone will go crazy over this treat!)
The cake pops themselves are super easy to make, it’s just the decoration that takes some time; if you decide to change strategy and go for a slightly more stream-lined approach, fine by us, they’ll still be super cute. Also, if you’re okay with loosening the reins in the kitchen, go ahead and get the kids involved. It’s a great afternoon activity and they get to see the fruits of their labor and create spooky treats!
Halloween Dessert Recipe: Spooky Cake Pop Witches

Cake Pop Witches

Yields 4 dozen

Ingredients
  • 1 (18 oz.) package cake mix (vanilla, chocolate, red velvet, etc.)
  • 1 (12 oz.) package white chocolate chips
  • 3/4 (16 oz.) tub vanilla or cream cheese frosting
  • 1 tablespoon vegetable shortening
  • 1/2-1 package ready-to-use white fondant (Wilton White Decorator Preferred Fondant, 24 oz.)
  • food coloring (green)
  • icing coloring (black, orange, purple—or primary colors to make your own)
  • lollipop sticks
  • parchment paper
  • 2 pieces of thick Styrofoam
Directions
  1. Bake your cake according to packaging directions and let cool completely. (Or make cake the night before.) Divide it into quarters and put the first quarter into a large bowl. Using two forks, begin crumbling your cake and breaking it down. Once you finish that quarter of cake, add the next quarter to the bowl and repeat with other sections.
  2. Once all of your cake is finely crumbled, spoon 3/4 tub of frosting into the bowl. Using your hands or continuing with your forks, incorporate the frosting until no more white is visible and it’s completely blended in. Using a small ice cream scooper (or just your hands), form walnut-size balls out of the cake and set on a parchment-lined baking sheet. Place in freezer for 30 minutes, or until very firm.
  3. Set up a double-boiler with a heat-proof, glass bowl set over a saucepan, 2 inches full of water. Place white chocolate chips in the glass bowl and cook over low heat, stirring until chocolate is completely melted. Add in vegetable shortening and 2 drops green food coloring, stir well and incorporate fully.
  4. Take your cake balls out of the freezer and insert lollipop sticks into the bottom of them. Dip or roll your cake balls in the green chocolate, paying close attention to the spot where the cake meets the stick. Firmly press the lollipop sticks into the Styrofoam in order for the cake and frosting to dry standing up. (Or you could dry on the parchment paper, but that will flatten them out a little.)
  5. Take your fondant and divide it into 3 sections; these will be different colors (black, orange and purple). Roll each section into a small ball and use a toothpick to dab spots of color on it. Red and yellow to make your orange fondant, red and blue for your purple. Knead balls of fondant until the color is fully absorbed and there are no streaks. Once you get the right colors, roll your orange fondant out to about 1/8th-inch thickness and cut into thin strips. Roll these strips slightly so they are just rounded.
  6. Cut the orange strips into 2-inch pieces, take 10 pieces and arrange them to look like hair on top of your cake ball witches. Cut several smaller pieces for the bangs. With your black fondant, divide the ball in 2 sections: one (small) section for the noses and mouths, one (large) section for the hats.
  7. For the hats, roll out approximately 48 flattened discs and place on top of the hair you created. These are the bases of the hats. Continue with the black fondant and create 48 mini cones. Using the tips of your fingers, bend the ends of the cones to look like the top of an old hat. Place these on top of the flattened discs.
  8. Roll out a thin amount of purple fondant (1/8-inch thickness) and cut into 48 thin strips (just like you did with the orange fondant). Cut into smaller pieces and wrap each mini rope around the base of your witch’s hat. Take a mini orange rope and create a buckle-like square to go on top of the purple band. Press gently so it adheres.
  9. Roll out thin, curved strips of black fondant to create mouths for the witches and place two black dots of fondant on their faces for the eyes.
  10. Serve and enjoy!

Friday, October 24, 2014

Restaurant-style Malai Kofta Curry (Cottage cheese dumplings dunked in rich creamy gravy)

IMG_5685

For paneer/cottage cheese – Alternately you may use store-bought paneer, crumbled –

 ½ cup
Milk – 1 litre
Vinegar/lemon juice – 3 tbsp

For kofta
Carrot – 1, big
Corn kernels – 3 tbsp
Coriander/dhania powder – 1 tsp
Red chili powder – 1 tbsp
Dry mango powder/amchur – 1 tsp
Cumin/jeera powder – 1 tsp
Coriander leaves – ¼ cup
Garam masala powder – 1 tsp
Bread crumbs/soy granules – ¼ cup
Salt – to taste
To be soaked (30 mins)
Fennel seeds – 1 tsp
Badam/Almonds – 3
For curry
Tomatoes – 1/2 cup
Onion – ½ cup
Ginger garlic paste – 1 tbsp
Cumin powder – 1tsp
Garam masala powder – 1 tsp
Turmeric – ½ tsp
Red chilli powder – 1 tbsp
Fresh cream – 2 tbsp
Kasuri mehi/dry fenugreek leaves – 1 tbsp
Coriander leaves – to garnish
Salt – to taste
Oil – 2 tbsp
Procedure:
  1. Boil the milk, remove from heat and add vinegar to it. You can see that the water separates, leaving the paneer. Strain the paneer from water and place in a separate large dish.
  2. Blend together the carrots and corn into a rough paste. Transfer to a mixing bowl.
  3. To this, add all the ingredients under ‘for kofta’ along with paneer.
  4. Make round balls with this mixture and set aside. This recipe makes about 9-10 balls. Shallow fry the balls till they get a golden crust. Remove onto a tissue cloth. Koftas are ready.
  5. To prepare the curry, heat oil in a pan and add the onions and ginger garlic paste. Fry till the raw smell disappears.
  6. Then add the tomato, cumin powder, turmeric, red chili powder, garam masala and a pinch of salt. Cook covered for a minute. Let cool.
  7. Once cool, blend the soaked almonds and fennel along with the onion-tomato mixture to form a smooth silky paste.
  8. Add this into the same pan and add about ½ cup water. Let it simmer for about 2 minutes.
  9. Add the cream, kasuri methi and desired salt. Simmer for another minute and remove from heat.
  10. Just before serving, place the koftas in the serving bowl and pour the rich silky gravy over it. Garnish with coriander leaves.
  11. Rich and restaurant-style paneer koftas are ready!!

Wednesday, October 8, 2014

Cake Pops 101: Tips and Tricks

http://cakejournal.com/tutorials/how-to-make-cake-pops/

cake pops
I’m slightly obsessed with bringing these fun little treats to parties. There is something so whimsical about a little piece of chocolate-covered cake at the top of a stick. And they have some major advantages at dessert time…no cutting, no serving, no mess, and usually no left-overs! People can grab them and go without even having to sit down.
If you’re interested in making cake pops, the first thing to do is read Bakerella’s book called Cake Pops Tips, Tricks, and recipes for More Than 40 Irresistible Mini Treats. I’ve read it from cover to cover and I still refer to it often when making pops. But in this blog post, I’ll break down the basic steps and provide some helpful tips of my own.
The Main Steps:
It is time-consuming to make cake pops. By dividing the work into three main steps, you can make it easier.
You can even do these steps on different days:
1. Baking the cake
2. Rolling the balls
3. Dipping the pops
 Step1: Baking the cake
For this step, prepare a 9 x 13 cake pan.  I like to spray mine with Wilton Bake Easy spray. This ensures that my cake never sticks to the pan.
cakepops2.jpg
Here is my prepared cake pan.
cakepops3.jpg
Use your favorite box or scratch cake recipe. I used a white almond sour cream cake which works well for cake pops. The recipe I used yields 7 cups of batter.
cakepops4.jpg
Once your cake is baked, allow it to cool. Score it into four equal parts with a knife. A box mix yields 12 cake pops from each quarter cake or 48 pops from the full cake. My batter is a little higher yield, so each quarter yields about 15 pops or 60 pops for the entire cake. Note the quantity that your own favorite recipe yields the first time you make them. This will help you plan in the future.
cakepops5.jpg
For this tutorial, I worked with one quarter of my cake. I removed it from the pan and let it finish cooling.
cakepops6.jpg
If you are not using the entire cake, wrap the other quarters tightly in plastic wrap and then foil. You can store them in the freezer for the next time you make cake pops.
cakepops7.jpg
Step2: Rolling the balls
For this step you will need:
Cake
Large bowl
Serving spoon
Creamy vanilla frosting (canned actually works best!)
Cookie sheet that fits in your refrigerator
Parchment paper
Small scoop for consistent sizing
cakepops8.jpg
One of the best tips for making consistent round cake pops is to find a small scoop. This one is a 3/4 tablespoon size and it works perfectly for cake pops.
cakepops9.jpg
Cut the outer edges from your cake because they can create hard lumps inside your pops.
cakepops10.jpg
Cut your cake into four pieces. Pick up two of the pieces at a time and rub them together over your bowl to crumble the cake into fine crumbs.
cakepops11.jpg
Continue the crumbling process with your hands or two forks until the pieces are very fine.
cakepops12.jpg
I always make homemade icing for my cupcakes and cakes, but canned icing actually works the best for cake pops! This vanilla cake is very moist so I add less than a quarter can of the frosting.  The amount you add will vary based on the moisture of your cake recipe. You want your mixture just moist enough to roll into balls. Tip: Be careful not to add too much icing or your mixture will be too moist. This can make for heavy cake pops with an unpleasant texture.
cakepops13.jpg
Distribute the icing evenly over your cake crumbs then mix it in. I use the back of my spoon for a smashing motion until the mixture binds together.
cakepops14.jpg
This is what the mixture looks like after mixing with the back of the spoon.
cakepops15.jpg
Use your scoop to get enough mixture for a well-rounded ball. Use your hand to round out the top of the mixture into the ball shape. This ensures your pops have a uniform size.
cakepops16.jpg
Place the mixture into your clean hand. Tip: Clean your hands frequently and keep them lightly moistened with water. This helps to get a smooth exterior on the cake balls.
cakepops17.jpg
Roll the ball between cupped hands applying firm and then gentle pressure. Do this until you are pleased with the shape of the cake ball.
cakepops18.jpg
Continue until your mixture is done. Place the cake balls on your parchment-lined cookie sheet as you go.
cakepops19.jpg
The finished cake balls look like this.
cakepops20.jpg
Cover them with plastic wrap and foil and refrigerate them for at least 4 hours in the refrigerator. Tip: If you’ve had problems with your cake balls falling off the sticks, they may not have been firm enough. Build time into your schedule so they can refrigerate overnight. This will help them firm up before the dipping process.
cakepops21.jpg
Step 3: Dipping the pops
For this step you will need:
Chilled cake balls
Microwave-safe bowl
Spoon
Foil-covered foam block
Skewer for making guide holes
Lollipop sticks
Candy color
Candy melts (I use Chocoley Bada Bing Bada Boom Dipping & Enrobing Formula)

cakepops22.jpg
Remove the foil from the cake balls and place them in the refrigerator while you prepare the candy melts. I take them out one at a time from the refrigerator as I dip them.
cakepops23.jpg
Place enough candy melts in the bowl so you can submerge each pop straight down into the chocolate and it will be covered to the stick.
cakepops24.jpg
Follow the directions to melt your candy melts.  Unfortunately, the brand of chocolate I use is only available for shipping in the U.S. and Canada. It is a very thin dipping chocolate. It melts to a silky smooth consistency for easy dipping.  Chilling the cake balls and using this chocolate ensure that I never have a cake ball fall off the stick.
cakepops25.jpg
Dip your lollipop stick into the melted chocolate about one inch.
cakepops26.jpg
Push the chocolate-covered end of the stick into the middle of the cake ball.
cakepops27.jpg
Dip your cake pop straight down into the chocolate until it is submerged and the melted chocolate touches the stick. Hold it sideways over the bowl and rotate it slowly as it drips.  Tap the wrist that is holding the pop with the free hand to encourage the chocolate to drip off.
cakepops28.jpg
When it is done dripping, turn it upside down so that any excess chocolate stops dripping. Let it dry like this for a few moments.
cakepops29.jpg
Clean off the excess chocolate on the stick with your finger for a nicer look.
cakepops30.jpg
Pre-drill a guide hole with your skewer before placing each pop into your foam block to dry.
cakepops31.jpg
I added a tiny bit of candy color to the melted chocolate between dipping each cake pop to demonstrate an ombre-effect color palette from light to dark pink. (Tip: You must use candy colors for chocolate because they are oil based. If you use icing colors, which are water based, your chocolate will seize.)
cakepops32.jpg
Here are the finished cake pops. I displayed them in a low vase filled with decorative glass beads.
cakepops1.jpg
Tip for re-using chocolate: The chocolate I recommended in this post is rather expensive because of the high quality. Save left-over chocolate  for your next project. Pour the chocolate onto parchment paper or plastic wrap and let it cool for 20 minutes. Peel the solid chocolate piece off and break into large pieces for storage.
cakepops33.jpg
Place the chocolate pieces in a zip lock bag and label it with the date. It will re-melt perfectly for your next project!
cakepops34.jpg
I hope you found some useful tips in this post and I welcome you to add your own cake pops tips in the comments!
Happy Caking!
Renée
